We may earn a commission from links on this page, at no extra cost to you.
What this means in real life
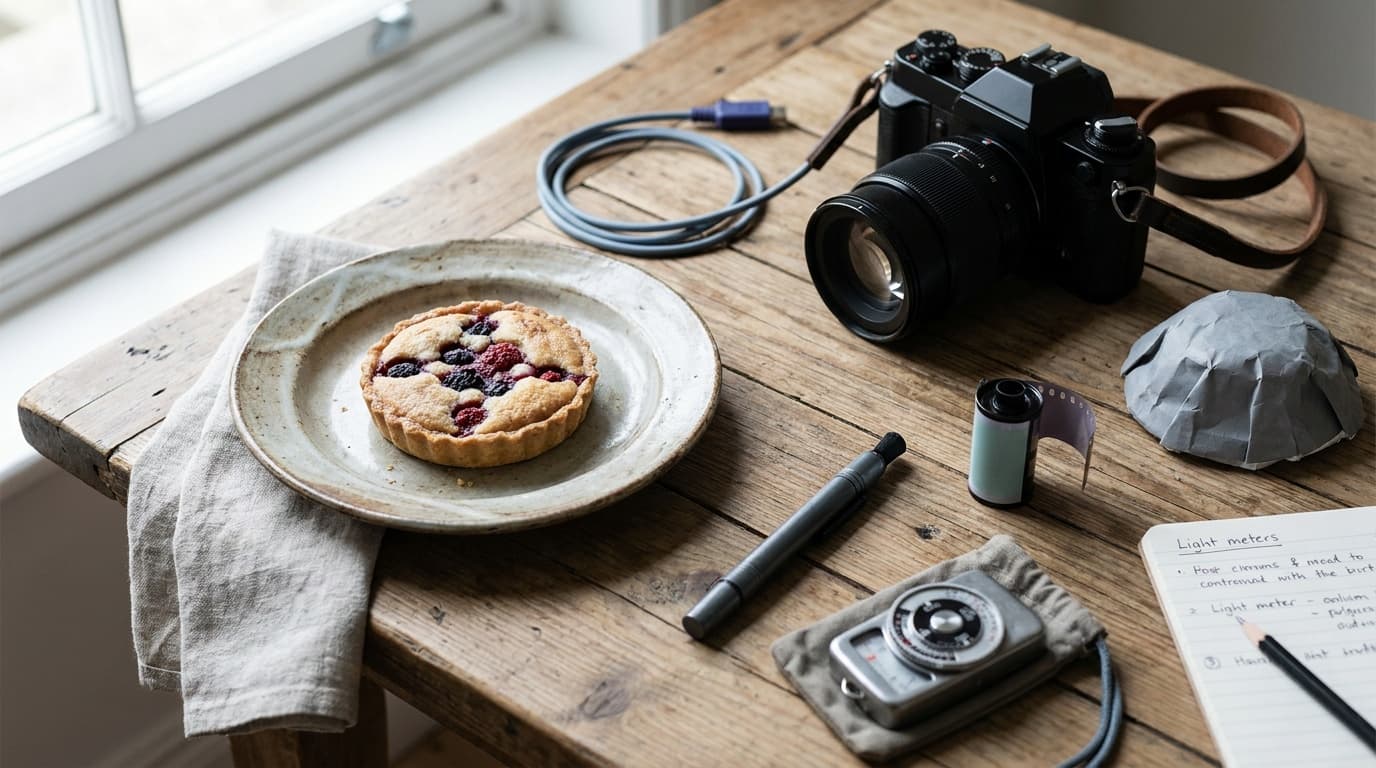
The single biggest factor in whether food looks delicious is the light, not the camera. Soft, directional light coming from the side rakes across the surface of a dish and brings out texture: the crumb of bread, the glisten of a sauce, the steam off a bowl. Light from directly above or from a built-in flash hits the food flat-on, killing texture and casting an ugly hard shadow. The second factor is freshness and styling, because food wilts and dries on camera fast. The settings themselves are simple once the light and the plate are right. Work near a window with the light coming from the side or slightly behind the dish.
The gear
You do not need much. A window for light, a piece of white foam board or even a sheet of paper to bounce light back into the shadow side, and a clean surface and background. A tripod is genuinely useful here because food does not move, so you can lock the composition, work slowly, and use a slower shutter at base ISO for the cleanest file. A lens that opens to f/2.8 or f/4 gives you control over background blur, and a macro or short telephoto is handy for tight detail shots. Skip on-camera flash entirely.
The settings
Set up by the window, then adjust for how much of the dish you want sharp.
Aperture is your main creative choice. A wide aperture around f/2.8 to f/4 throws the background soft and isolates one bite or one glass, which suits a single dish. A narrower aperture like f/8 keeps a full table or a flat-lay readable edge to edge. Keep ISO low when you can, leaning on the tripod and the window light. Get the white balance right so the food looks its natural color, because a cold or yellow cast makes any dish look unappetizing. It all sits inside the exposure triangle.
Technique
Position the dish so the window light comes from the side or from behind it, then place a white card opposite the window to fill the shadows and keep them from going too dark. Focus on the most appealing part of the plate, the front edge of a stack, the yolk, the garnish, and let the rest fall away if you are shooting wide open. Shoot before the food cools and dries, because steam, gloss, and crispness fade within minutes. Style the plate deliberately: wipe drips, add a few props or ingredients around it for context, and leave some negative space. The careful, controlled approach overlaps heavily with product photography, where light shaping and styling are everything.
Composition
Two angles do most of the work. The flat-lay, shot straight down, suits spreads, bowls, and arrangements where the layout is the story. The three-quarter or eye-level angle suits tall food like burgers, layered cakes, and drinks, where height and depth matter. Use a clean, simple background that complements the food rather than competing with it, and bring in props, a napkin, cutlery, a few raw ingredients, to suggest a setting without cluttering the frame. Leave breathing room around the dish.
Common mistakes
Shooting under overhead kitchen or restaurant lights gives a flat, color-shifted result; move to a window. Using direct flash flattens the food and blows out highlights; bounce or use natural light instead. Getting the white balance wrong makes the dish look stale; set it deliberately. Shooting too slowly so the food wilts loses the freshness; style and shoot quickly. And a cluttered background pulls attention off the plate; keep it clean.
What is the best light for food photography?
Soft, directional natural light from a window, coming from the side or slightly behind the dish, with a white card bouncing light back into the shadows. Avoid overhead room lights and on-camera flash, which flatten the food and shift its color.
What aperture should I use for food?
Around f/4 to blur the background and isolate one element, or f/8 to keep a whole spread or flat-lay sharp front to back. Choose based on whether you want a single hero dish or a readable full scene.
Do I need a tripod for food photography?
It is not required but it helps a lot. Food does not move, so a tripod lets you compose slowly, keep the framing locked while you style, and use a slow shutter at base ISO for the cleanest, lowest-noise file.
Related Learn guides
Black and White Photography: How to See and Shoot in Mono
Black and white photography is about light, contrast, and shape rather than color. Here is how to shoot for mono and convert raw files cleanly.
Read guide
Camera Settings for Snow: How to Keep White Snow White
Snow fools your meter into gray, underexposed photos. Here are the settings and the exposure compensation that keep snow bright, clean, and the right color.
Read guide
Color Grading Basics: Giving Your Photos a Consistent Look
Color grading is the creative step after correction, where you shape mood and a signature look. Learn the core tools and how to build a style without overdoing it.
Read guide
Color Temperature and Kelvin Explained: Reading Light by the Numbers
Color temperature in Kelvin describes how warm or cool a light is. Learn the scale from 3200K tungsten to 7500K shade and how to dial it in by hand.
Read guideResearched, not personally tested: picks come from specs, verified-owner reviews, and expert sources, scored into the Aperture Score. As an Amazon Associate I earn from qualifying purchases. We may earn a commission from links here, at no extra cost to you. How we research →