We may earn a commission from links on this page, at no extra cost to you. Picks are researched, not sponsored.
What composition actually is
Settings decide how a photo is exposed. Composition decides whether it is worth looking at. The good news for beginners is that strong composition is mostly a small set of repeatable decisions, not a gift you are born with. You arrange the subject, the lines, the edges, and the empty areas so the eye lands where you want it and stays there.
Most weak photos are not exposed wrong. They are composed lazily: the subject is dead center, the background is cluttered, and nothing tells the eye where to go. Fixing that is a habit you build, frame by frame.
The five techniques in this cluster
Each of these gets its own walkthrough. Start with whichever fits the photo in front of you, then read the others as you go.
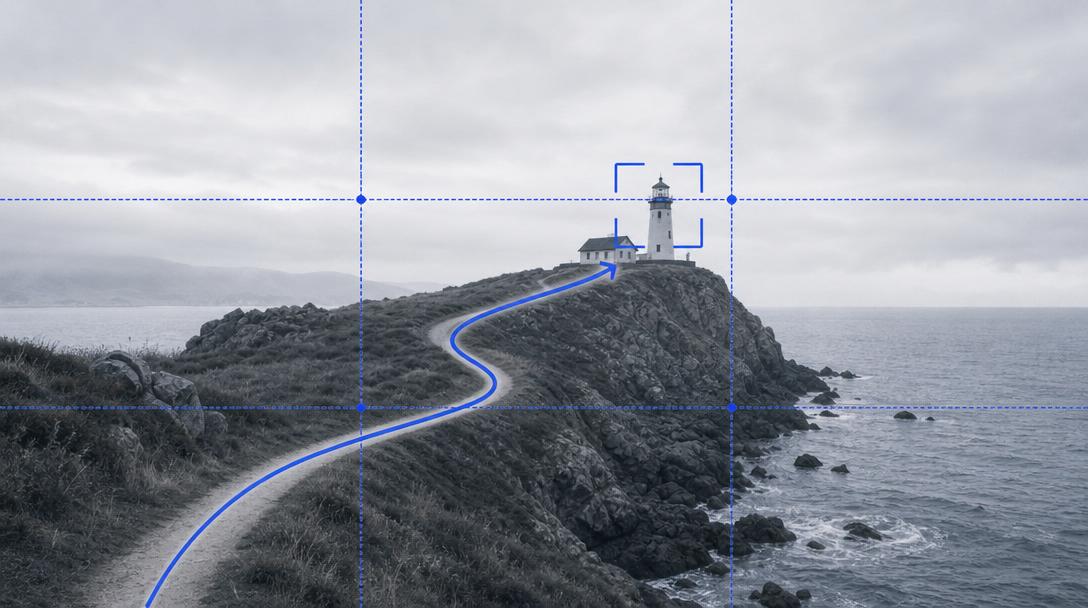
- Rule of thirds. Place the subject or the horizon off-center, along imaginary thirds lines, instead of in the middle. The fastest upgrade from snapshots.
- Leading lines. Use roads, fences, shorelines, and shadows to pull the viewer's eye toward the subject.
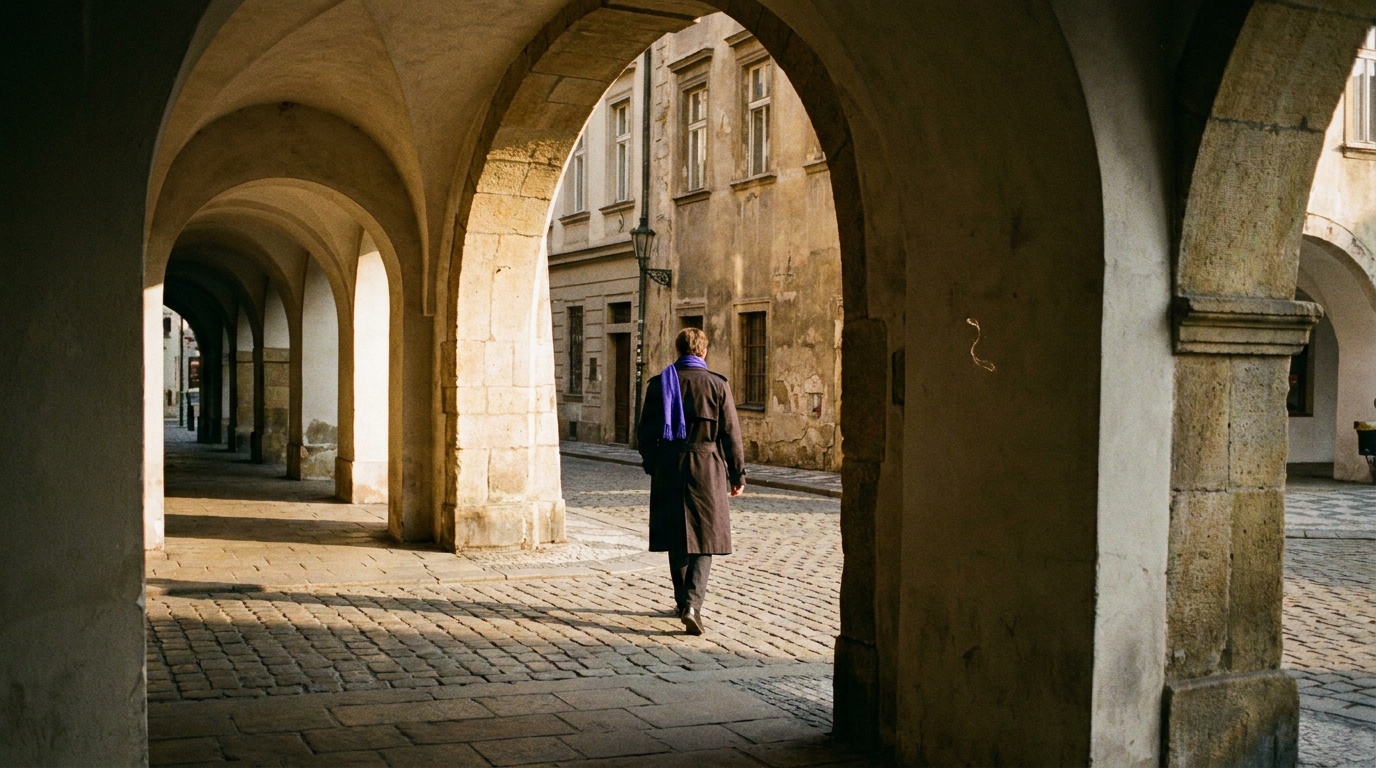
- Framing and foreground. Shoot through doorways, branches, or arches, and add something close to the lens to build a sense of depth.
- Symmetry and patterns. Use balance and repetition for order and calm, then break the pattern to create a focal point.
- Negative space. Leave deliberate empty area around the subject so it has room to breathe and stand out.
How to use them together
You rarely use one technique in isolation. A strong frame might place the subject on a third, run a leading line into it from the corner, and surround it with negative space. The techniques stack. Think of them as a checklist you run quickly before you press the shutter: where is the subject, what leads the eye to it, what frames it, and what can I remove.
Slow down. The single biggest difference between a snapshot and a composed photo is the five seconds you spend looking at the edges of the frame before you shoot, not after.
A five-second checklist before you press the shutter
Run these four questions every frame until they are automatic:
- Where is the subject? Put it on a third unless the scene is symmetrical.
- What leads the eye to it? Find a road, edge, shadow, or line of sight, and start it near a corner.
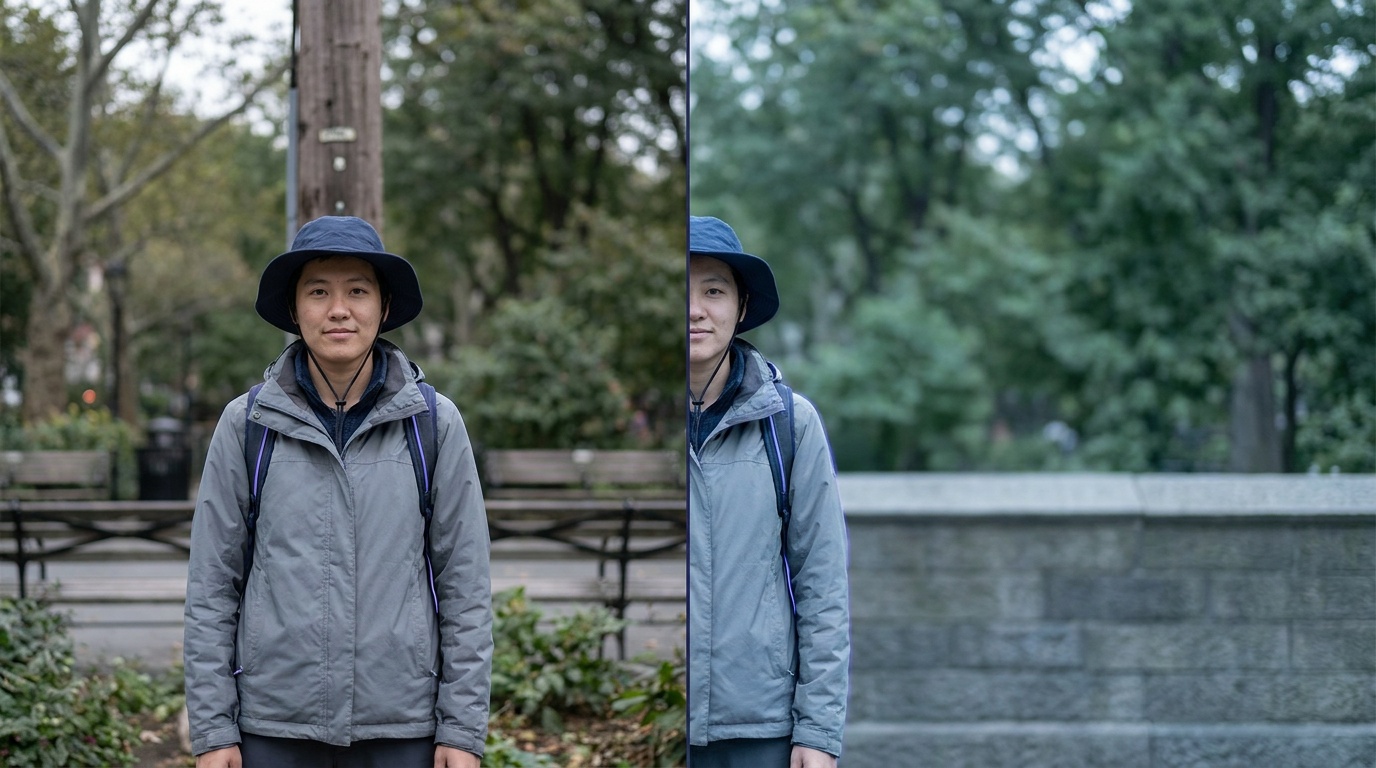
- What frames or separates it? A darker border, a wide aperture for a soft background, or open space on the facing side.
- What can I remove? Step left or right, change height, or zoom to drop the pole growing out of a head and the bright distraction at the edge.
The whole pass takes about five seconds and catches the mistakes you would otherwise only notice at home.
When to break the rules
Every one of these is a starting point, not a law. Centered subjects can be powerful when the scene is symmetrical. A cluttered frame can carry energy in street photography. Dead-center placement signals confrontation and stillness, which is sometimes exactly the point. The rules exist so you can make a deliberate choice, including the choice to ignore them.
The order matters: learn the habit first, then break it on purpose. Breaking a rule you never understood usually just looks like a mistake.
Common mistakes
- Composing after the fact. Cropping in editing can rescue a frame, but it throws away resolution and limits your options. Compose in the viewfinder first.
- Only ever using one technique. If every photo is a centered subject, or every photo is a thirds placement, the work starts to feel mechanical. Vary the approach to the scene.
- Ignoring the background. A great subject placement means nothing if a pole appears to grow out of someone's head. Check the whole frame, not just the subject.
Where this fits
Composition is the half of photography your camera cannot do for you. The other half is exposure, and the two work together: a clean composition needs the right depth of field to separate the subject, which comes straight from the exposure triangle. For a broader overview of arranging a frame, see the composition fundamentals guide. Then apply all of it in a genre, whether that is landscape photography, street photography, or portrait photography.
Which composition technique should I learn first?
The rule of thirds. It is the simplest to apply, works in almost any genre, and gives the biggest immediate improvement over centering everything. Once it becomes automatic, add leading lines and negative space.
Do professional photographers actually think about these rules while shooting?
Early on, yes, consciously. With practice the decisions become fast and mostly unconscious, the way a fluent reader stops sounding out words. The goal is not to recite rules in the field, it is to build instincts so good composition happens without much thought.
Can good composition fix a boring subject?
It helps, but only so far. Composition controls how a viewer reads a scene, not whether the scene is interesting. The strongest photos pair a subject worth shooting with an arrangement that does it justice.
Keep going
Next useful steps
Pick one. Each link continues the same job without starting the research over.
Related Learn guides

Content Credentials and C2PA Explained for Photographers
Content Credentials record a photo's signed provenance and edits. Learn what C2PA proves, what it cannot prove, and how capture-to-export workflows work.

Open Gate Video Explained: When 3:2 Is Worth It
Open Gate records a taller sensor area for flexible 16:9, 9:16, and square crops. See when it helps, what it costs, and how to frame it correctly.

Pre-Capture Photography Explained: Get the Frame Before the Click
Pre-Capture buffers photos before the shutter is fully pressed. Learn how it works, which settings change, and when RAW, flash, or focus may be limited.

RAW vs JPEG: Which File Format Should You Shoot?
RAW keeps all your sensor data for maximum editing freedom; JPEG is smaller and ready to share. Here is how they differ and when each one is the right call.
Researched, not personally tested: picks compare specifications, available owner feedback, and established expert sources. As an Amazon Associate I earn from qualifying purchases. We may earn a commission from links here, at no extra cost to you. How we research →