We may earn a commission from links on this page, at no extra cost to you. Picks are researched, not sponsored.
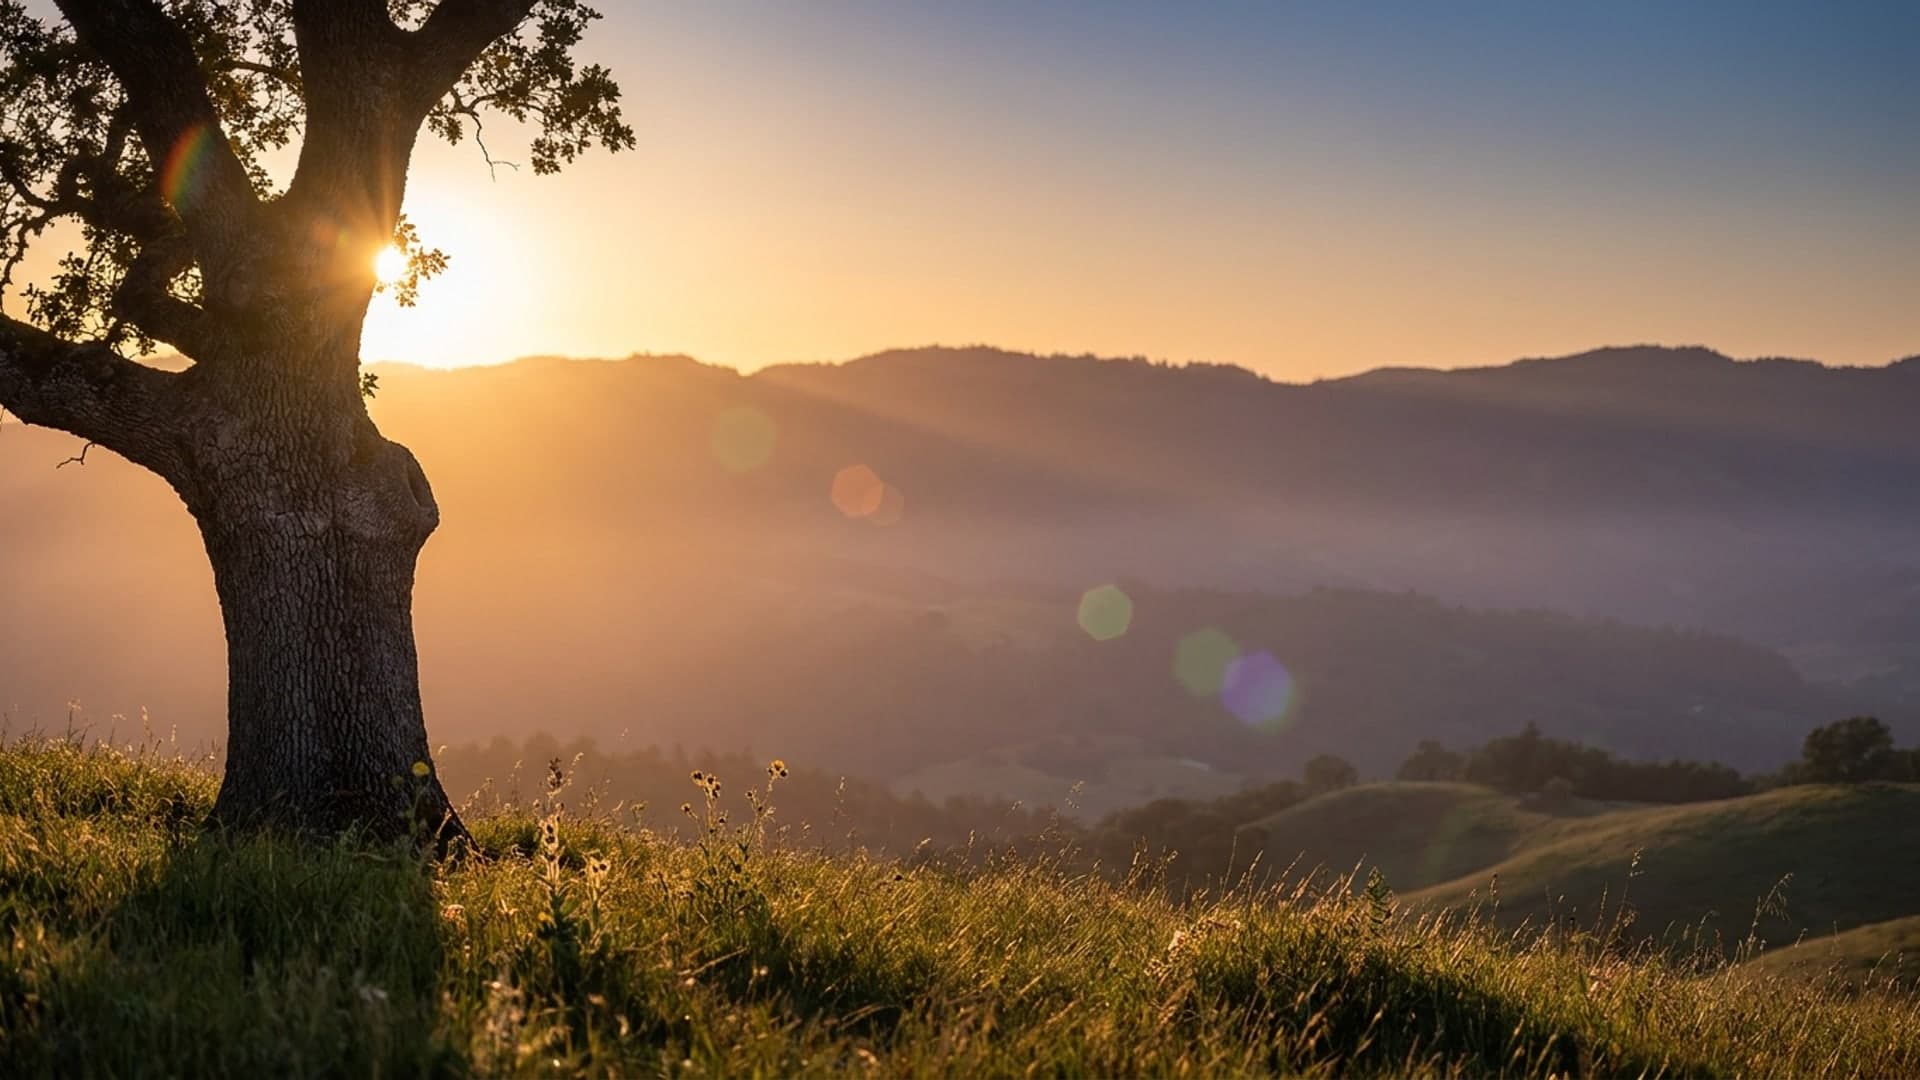
Every lens is a stack of glass elements. Most light passes straight through to the sensor, but a small share reflects off each glass surface and bounces around inside the barrel. With an ordinary scene, that stray light is too weak to notice. With the sun or a bright lamp in or near the frame, it becomes visible. That is lens flare.
What causes lens flare?
Canon's description of the problem is precise: reflections happen because of the large change in refractive index where glass meets air on each lens surface. Every one of those boundaries can bounce some light back toward the front of the lens, where it reflects again and lands on the sensor in the wrong place.
Flare comes in two main forms:
| Type | What it looks like | Main cause |
|---|---|---|
| Veiling flare | A wash of haze that lifts the shadows and lowers contrast, often near the light source | Stray light scattered across the whole image |
| Ghosts | Distinct circles, polygons, or arcs, often in a line through the center of the frame | Light reflecting between specific lens surfaces |
| Sunstar | Sharp rays coming out of a point light source | Diffraction at the aperture blades (not technically flare, but seen in the same shots) |
Ghosts usually line up along a straight line from the light source through the center of the frame. That is a useful diagnostic: if the colored shapes move when you tilt the camera, and they stay on that line, they are lens reflections, not something in the scene.
Why some lenses flare more than others
More glass surfaces mean more chances for reflection, so complex zooms tend to flare more than simple primes. Coatings are the main defense. Canon developed its Subwavelength Structure Coating to cut reflections, especially for light arriving at steep angles on the curved elements of wide-angle lenses. Nikon's lens glossary describes several coatings aimed at the same problem, including Nano Crystal Coat for light entering the lens diagonally and ARNEO for a light source inside the frame. Older and very inexpensive lenses often have simpler coatings, which is part of why vintage glass is prized for its flare.
Dirt makes it worse. Fingerprints, dust, and water droplets on the front or rear element scatter light and add haze around bright sources.
When should you avoid lens flare?
Avoid flare when you need clean contrast and accurate detail: real estate interiors with bright windows, product shots, architecture, landscapes where the haze would wash out the foreground, and any frame where a ghost would land on a face. Flare is also hard to fix in editing when it covers fine detail, so preventing it at the shutter saves time.
How to reduce flare
- Use the lens hood. Nikon notes that a hood keeps unwanted light from entering the lens and so reduces the chance of glare and flare. Use the hood made for that lens; the wrong one can darken the corners. The hood only helps when the light source is outside the frame.
- Shade the lens yourself. When the sun is just outside the frame, hold your hand, a hat, or a card above the lens, just out of view. Take a test shot to make sure your fingers are not in the corner.
- Remove extra filters. Every filter adds two more glass surfaces. A protective UV filter is a common source of ghosts in night scenes with streetlights. Canon's aperture blade guide also recommends removing UV filters when you want clean sunstars, because they can diffuse light.
- Change the angle. Moving a few degrees or stepping so that the sun hides behind a tree, building, or your subject's head often removes the worst ghosts.
- Clean the glass. Check both the front and rear elements.
- Bracket a hand-blocked frame. For landscapes on a tripod, take one frame normally and one with your hand blocking the sun, then blend the clean foreground into the first frame in editing.
When should you use lens flare creatively?
Flare can add warmth, mood, and a sense of light spilling into the scene. Backlit portraits, golden hour fields, and summer lifestyle shots often use a soft flare on purpose. The same Nikon hood article points out that photographers sometimes remove the hood when they want flare in the frame.
Practical settings for intentional flare
- For soft, glowing flare: shoot near wide open, around f/2 to f/4, with the sun low and just at the edge of the frame. A typical backlit portrait readout is f/2.8 · 1/500 · ISO 100, then adjust with exposure compensation to protect the skin tones.
- For a sunstar: stop down to around f/11 to f/16 and let the sun peek past an edge, such as a tree trunk or a rooftop. A clean starting point is f/16 · 1/250 · ISO 100. Canon's guide explains that the star shape comes from diffraction at the corners of the aperture blades, and that lenses with an odd number of blades produce twice as many rays as blades, while even-bladed lenses produce one ray per blade.
- For controlled ghosts: move the camera slowly while looking at the screen or viewfinder. Ghosts slide along their line, so you can park them away from the subject's face.
Partial blocking is the most useful trick. A sun fully in the frame produces strong veiling flare and loses contrast; a sun half hidden behind a branch gives you a bright point, a sunstar at small apertures, and a much cleaner frame. This is the same light you work with in backlight and silhouettes and at golden hour.
Exposure with the sun in the frame
A bright light source fools the meter. In matrix or evaluative metering, the camera often underexposes the rest of the scene. In spot metering on the sun, it underexposes badly. Meter for the subject or the sky beside the sun, use the histogram to check that the important highlights are not clipped, and expect the sun itself to be pure white. A clipped sun is normal; a clipped face is not. If you need both the bright sky and a dark foreground, HDR photography can help, though flare can differ between bracketed frames.
How to remove lens flare in editing
Small ghosts are the easiest fix. Treat them like dust spots. Adobe's guidance for Lightroom is to use Heal and Clone for small areas, the standard Remove tool for small whole objects, and Generative Remove for larger distractions. Generative Remove works on RAW and non-RAW files and is non-destructive.
Veiling flare is harder because it affects the whole tonal range. A few approaches help:
- Dehaze and contrast. Lightroom and similar editors can restore some lost contrast in hazy areas. Use a local mask so you do not crush the parts of the frame that were fine.
- Blacks and shadows. Pull the blacks down to restore depth, then check the shadows for color casts from the flare.
- Blend a clean frame. If you shot a hand-blocked frame on a tripod, layer it in and mask the clean area into the final image.
Editing has limits. A large, bright ghost over fine texture often leaves a smudge after removal. Preventing the flare at capture is usually faster than fixing it later. For the editing basics behind these steps, start with the intro to photo editing.
Common mistakes
- Leaving the hood in the bag. It is the simplest flare control you own. Many hoods reverse onto the lens for storage, so there is no reason to leave it behind.
- Stacking filters. A UV filter plus a polarizer plus an ND adds six glass surfaces in front of the lens. Use only the filters the shot needs.
- Letting a ghost sit on a face. Check the screen at full size before moving on. A tiny shift of the camera usually moves the ghost.
- Expecting a sunstar at f/2.8. Sunstars need a small aperture and a point light source. Wide open, you get soft flare instead.
- Trusting the meter with the sun in frame. Check the histogram and adjust exposure for the subject.
Where this fits
Flare control is part of working with difficult light, covered in shooting in different light and how to photograph a sunset. The aperture you pick for a sunstar is also an exposure triangle choice, so shutter speed or ISO will change to compensate. Flare shows up constantly in landscape photography, where the sun is often in or near the frame. Coatings and hood design are worth comparing when you shop the best wide-angle lenses.
What causes lens flare?
Bright light, usually from the sun or a lamp, reflecting off the glass surfaces inside the lens. The reflections land on the sensor as haze (veiling flare) or as colored shapes (ghosts). Light sources in or just outside the frame are the main trigger.
Does a lens hood stop lens flare?
A hood reduces flare from light sources outside the frame by blocking that light before it reaches the front element. It cannot stop flare when the sun itself is in the frame. Use the hood made for your lens to avoid dark corners.
What aperture gives a sunstar?
Stop down to around f/11 to f/16 and let the sun peek past an edge. The number of rays depends on the aperture blades: an odd number of blades gives twice as many rays as blades, and an even number gives one ray per blade.
Can you remove lens flare in Lightroom?
Small ghosts can be removed with the Heal, Clone, or Remove tools, and larger ones with Generative Remove. Veiling flare is harder; masked dehaze, contrast, and black adjustments help, and blending in a clean frame shot with the sun blocked works best.
Practice this
Turn the guide into a working setup
Keep going
Next useful steps
Pick one. Each link continues the same job without starting the research over.
Related Learn guides
Aperture Priority vs Shutter Priority: Which to Use
Aperture priority lets you control depth of field; shutter priority lets you control motion. Here is what each mode locks, what it leaves to the camera, and when to pick which.
Back Button Focus Explained: What It Is and Why to Use It
Back button focus moves focusing off the shutter button onto a rear button, so the shutter only takes the photo. Here is what it does and how to set it up.
Backlight and Silhouettes: Shooting Into the Light
When the light is behind your subject, it either glows or goes black. Here is how to control which one you get.
Composition Techniques: Five Habits That Build Better Photos
Composition is a set of repeatable habits, not innate talent. Here are five techniques that decide whether a photo is worth looking at.
Researched, not personally tested: picks compare specifications, available owner feedback, and established expert sources. As an Amazon Associate I earn from qualifying purchases. We may earn a commission from links here, at no extra cost to you. How we research →